Table of Contents
ToggleA cluttered under-sink cabinet isn’t just a nuisance, it’s wasted real estate in one of the busiest rooms of your home. Whether you’re wrestling with plumbing fixtures, cramming cleaning supplies into gaps, or watching bottles topple every time someone opens the door, poor bathroom under sink storage creates headaches daily. The good news? Fixing it doesn’t require a full vanity replacement or professional installation. By assessing your space, choosing the right systems, and installing them thoughtfully, you can transform that chaotic void into an organized, functional zone. This guide walks you through seven proven solutions that actually work, from pull-out drawers to tiered organizers, so you can reclaim that valuable cabinet space.
Key Takeaways
- Bathroom under sink storage doesn’t require a vanity replacement—proper organization systems like pull-out drawers and tiered organizers can transform chaotic cabinets into functional zones.
- Measure your cabinet dimensions, map out plumbing obstacles, and assess what items you store to choose the right under sink storage solution that fits your specific space.
- Pull-out drawers and sliding shelves provide full visibility and access to back items, while tiered organizers and stackable bins offer flexibility without requiring installation.
- Choose stainless steel or powder-coated metal organizers in humid climates to prevent rust, and prioritize clear plastic bins so you can see contents without opening each container.
- Proper installation requires a level base, correct fasteners for your cabinet material, 1-inch clearance around plumbing, and gradual testing before fully loading new systems.
- Label bins by category and use waterproof containment trays under supplies to prevent mold and moisture damage, the most common hidden problems in bathroom under sink storage.
Why Under Sink Storage Matters
The area beneath your bathroom sink is prime real estate, yet it’s often the first place to devolve into chaos. Moisture from leaks and pipes, awkward plumbing runs, and irregular shapes make it tricky to organize, but that’s exactly why smart solutions matter. When items are properly stored and accessible, you actually use products instead of buying duplicates. You spot leaks earlier because you can see inside the cabinet regularly. And frankly, opening a vanity door to find everything in its place instead of a jumble of bottles and rags feels surprisingly good.
Most under-sink problems stem from treating the space like a dumping ground rather than a functional storage zone. Pipes take up unexpected room. Dead space above the cabinet bottom goes unused. Items get shoved behind things, forgotten until they’re empty or expired. A little planning and the right organizers, whether off-the-shelf or DIY, give you visibility, accessibility, and actually usable storage capacity. You’d be surprised how much you can fit when everything has a place.
Assess Your Current Under Sink Space
Before you buy a single organizer, take 10 minutes to understand what you’re working with. Open that cabinet door and actually look at the problem, not just jam things in and close it again.
Measure and Map Out Your Layout
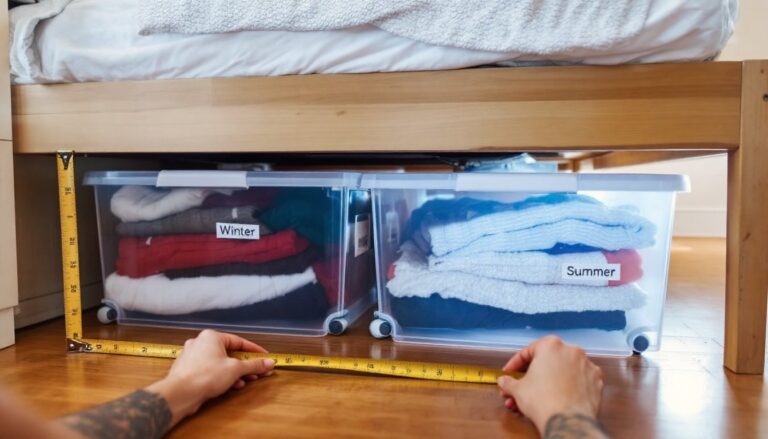
Grab a tape measure and note the following dimensions: width (inside edge to inside edge), depth (front of cabinet opening to back wall), and height (from the bottom to the underside of the sink basin). Write these numbers down: they’re your reference for every organizer you consider.
Next, identify the obstacles. Mark where the p-trap (the U-shaped pipe under the drain) sits, where supply lines run, and whether there’s any insulation or backing material. Sketch a rough top-down view if the layout is complex, it takes two minutes and saves you from buying something that won’t fit. Check if the cabinet floor is solid or has a recessed area where pipes run: this affects how tall your organizers can be.
Measure the space on either side of the plumbing. Often there’s usable room along the sides that homeowners miss entirely. Also note the height from the cabinet bottom to the lowest point of the sink basin overhead. If you’re planning tiered or stacked solutions, you need clearance: otherwise, you’re jamming things into spaces and defeating the purpose.
Finally, consider what you actually store under there. Cleaning supplies, hair tools, medications, spare toilet paper, personal care items? List them by frequency of use. Daily-grab items should be most accessible: seldom-used backup stock can sit higher or deeper. This small exercise shapes every choice that follows.
Smart Organization Systems That Work
Now that you know your space inside and out, let’s talk solutions. The best under-sink storage system isn’t always the most expensive or trendy, it’s the one that fits your cabinet and your habits.
Pull-Out Drawers and Sliding Shelves
Pull-out drawers and sliding shelves are game-changers if your cabinet has enough depth and your plumbing layout allows it. These are baskets or shallow bins mounted on ball-bearing slides that glide out smoothly, giving you full access to items at the back without knocking over everything in front.
Why they work: You see and reach everything without hunching into the cabinet. Items don’t get lost in the back shadows. Water or spills won’t pool because the drawers sit on elevated slides. Products like the Rev-A-Shelf and Knape & Vogt lines are industry standards, but IKEA hackers often modify cheaper alternatives, drawer systems and basic slides from hardware stores work surprisingly well with a little customization.
The catch? Installation requires measuring carefully for the slide hardware, then securing it to the cabinet sides with the right fasteners. If your cabinet is particleboard (common in budget vanities), you’ll use pocket hole screws or brackets: if it’s solid wood, standard #8 wood screws into pilot holes work fine. Avoid drywall anchors in cabinet walls, the pulls generate real force, and anchors will eventually tear out.
For a no-drill option, look for adhesive-backed slide systems or magnetic-mount organizers, though these have weight limits. Test with a light load first. If you’re renting or prefer not to modify the cabinet, wire shelf dividers or free-standing slim drawer units that slide in and out work adequately, though they don’t maximize the full space.
Tiered Organizers and Stackable Bins
Tiered shelf risers and stackable bins offer more flexibility and require zero installation. These sit flat on the cabinet bottom and create vertical zones so you’re using height as well as footprint.
A tiered riser, often a 2-tier or 3-tier metal or plastic shelf, lets you store heavier items on the bottom tier and lighter supplies, cosmetics, or medications on the shelf above. This keeps frequently-used items at eye level and prevents you from stacking bottles precariously. Clear plastic bins are invaluable because you can see what’s inside without opening each one. Label each bin, “Cleaning,” “Hair Care,” “First Aid”, and stick to it.
When choosing stackable bins, measure your cabinet width to ensure you can fit what you need side by side. A common mistake: buying bins that fit individually but can’t be placed two-wide because the cabinet interior is 32 inches and your two bins are 17 inches each. Double-check before checkout. U-shaped organizers specifically designed to fit around p-traps are available in plastic and metal: they maximize the awkward spaces on either side of the plumbing.
You can get sophisticated inspiration from sources like Remodelista and Houzz, which showcase before-and-after bathroom remodels. Seeing how others organized under-sink spaces, especially in small bathrooms, often sparks ideas you wouldn’t think of alone. For a skinny vanity or pedestal sink with minimal under-cabinet space, a skinny storage cabinet positioned nearby extends your storage without forcing everything into an impossible spot.
Materials matter: metal organizers are durable and look sleek but can rust in damp bathrooms: plastic is lighter and corrosion-proof but may look cheap if quality is poor. Choose stainless steel or powder-coated metal if you’re near the coast or in a humid climate. For everyday use in standard bathrooms, mid-range plastic organizers perform well and cost less.
DIY Installation Tips for Maximum Impact
Whether you’re installing pull-out slides, securing a tiered riser, or arranging bins, a few principles separate projects that last from ones that fail within months.
Prepare the base. Wipe out the cabinet thoroughly, removing dust, old debris, and any moisture. If there’s standing water, investigate for leaks before proceeding. Allow the surface to dry completely: installing organizers on a wet base causes rust and mold. Check that the cabinet floor is level using a small torpedo level: if it’s noticeably off, shim it with plastic shims or a thin strip of wood so drawers and shelves sit properly.
Secure hardware correctly. If fastening slides or brackets, use the right fastener for your cabinet material. Particleboard cabinets need #8 or larger wood screws with washers to prevent pull-through: pocket holes and Kreg jigs distribute load better. Solid wood accepts standard screws: pre-drill to prevent splitting. Never trust a single screw on a 30-pound pull-out drawer, use at least two fasteners per side, properly countersunk and level.
Account for plumbing and clearance. Even if you’ve mapped your p-trap, double-check before installing tall organizers. Tighten any loose supply-line connections or escutcheons (the trim rings around pipes) while the cabinet is empty, you won’t want to do this with bins in the way. Ensure pull-out drawers don’t contact the p-trap when extended: a 1-inch clearance on all sides prevents accidents.
Test and adjust. Before fully loading a new pull-out system, open and close it several times empty to ensure smooth operation. If slides are stiff, a silicone-based lubricant helps (avoid WD-40 in wet environments, it attracts dust). Load gradually and retest. An overstuffed drawer that barely closes will jam and damage hardware.
Label and contain. Once installed, use waterproof labels and bin systems to keep chaos at bay. A small containment tray under cleaning supplies or medications catches leaks and prevents stains. Wipe spills immediately: moisture under organizers breeds mold fast, especially in dark cabinets.
Know when to call a pro. If you’re uncovering rot in the cabinet floor, the p-trap is leaking actively, or plumbing requires relocation, stop and call a plumber. Vanity replacement or structural repairs aren’t DIY jobs unless you’re experienced. Similarly, if your cabinet is custom or part of a finalized bathroom aesthetic and you’re unsure about installation, a carpenter or cabinet shop can install systems faster and with guaranteed fit.