Table of Contents
ToggleThe gap between your washer and dryer is prime real estate that most homeowners leave empty. Whether you’re working with a closet-sized laundry room or a spacious utility area, that narrow strip of wall and floor can hold detergent, supplies, and seasonal items without eating into living space. Between washer and dryer storage doesn’t require major renovation, just smart planning and a handful of affordable solutions. This guide walks you through assessing the space, choosing storage that fits, and tackling a few simple DIY projects that’ll free up cabinet space elsewhere in your home.
Key Takeaways
- Between washer and dryer storage reclaims overlooked dead space in laundry rooms without requiring major renovation, electrical work, or impacting living areas elsewhere in your home.
- Accurate measurements in three dimensions—width, height, and depth—are essential before purchasing any storage solution, and accounting for obstacles like outlets and vents ensures proper airflow and safety.
- Popular between appliance storage options include wall-mounted shelves, freestanding utility shelves, rolling carts, and drawer cabinets, each suited to different gap sizes and floor conditions.
- DIY wall-mounted shelf projects and rolling cart customizations are affordable, time-efficient solutions that require only basic tools and can be completed in an afternoon.
- Proper ventilation must be maintained to prevent mold growth, especially in front-loading washers, so storage placement should never restrict airflow around the appliances.
Why Between-Appliance Storage Matters
Most laundry rooms are afterthoughts. They’re tucked into a corner of the basement, squeezed into a garage, or hidden behind a kitchen door, and storage is rarely a priority during the install. That space between the washer and dryer becomes invisible, even though it’s one of the easiest places to add function without a major commitment.
The reality is simple: laundry supplies pile up. Detergent bottles, fabric softener, dryer sheets, stain removers, and cleaning cloths need somewhere to live. Without dedicated storage nearby, these items migrate to kitchen cabinets, bathroom shelves, or, let’s be honest, pile up on top of the appliances. Between-appliance storage keeps everything within arm’s reach while you’re actually using it, which saves time and keeps your laundry workflow smooth.
Also, this storage doesn’t consume your main living areas. A tall narrow shelf or rolling cart between the appliances won’t impact your kitchen layout or bedroom closets. It’s dead space being repurposed, which means you’re literally gaining storage capacity with zero sacrifice elsewhere in the home.
Building storage here also tends to be affordable. You’re not hiring an electrician, moving plumbing, or dealing with load-bearing walls. A simple shelf, cart, or custom frame requires basic tools, a tape measure, and an afternoon of work.
Assessing Your Available Space
Before you buy anything, measure the gap between your appliances accurately. Too many DIYers eyeball it, buy storage, and watch it sit in the driveway because it doesn’t fit.
Measuring for the Perfect Fit
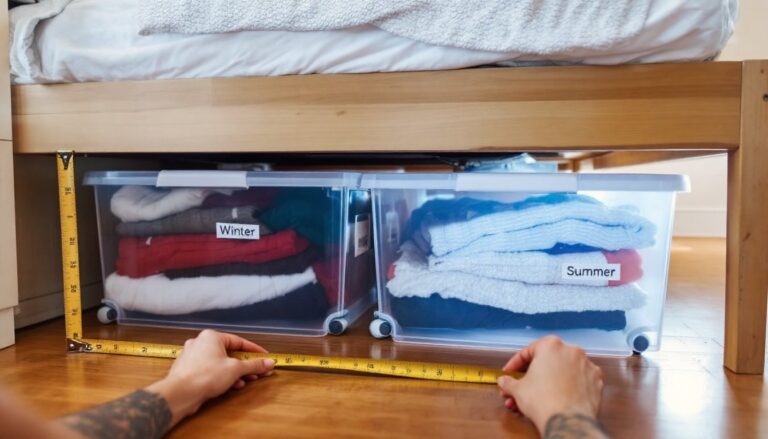
Measure three times: width, height, and depth. Start with width. If your washer and dryer sit side by side, measure the horizontal gap between them at the top, middle, and bottom. Appliances aren’t always perfectly aligned, so you’ll want the tightest measurement, that’s your actual usable width.
Height is critical. Measure from the floor to the bottom of any overhead shelving, cabinets, or the ceiling. Don’t forget to account for the thickness of whatever storage you’re installing. A 1-inch-thick shelf takes up real height, and if you’re working in a tight space, it matters.
Depth is often overlooked. How far back can your storage extend before it hits the wall or blocks access to the sides of the appliances? Measure from the front edge of one appliance to the wall behind them. Many between-appliance gaps are deeper than they look, sometimes 12 to 18 inches, which gives you options for wider shelving or carts.
Note any obstacles: electrical outlets, vents, or water supply lines. If there’s an outlet, don’t block it. If there’s a vent, ensure your storage won’t restrict airflow. Most people don’t realize that washers and dryers need breathing room, especially front-loaders, which can develop mold without proper ventilation.
Also check whether the floor is level. Place a 2-foot level on the floor between the appliances. If it tilts, a rolling cart is safer than a fixed shelf, carts can adjust to uneven surfaces without looking wonky.
Practical Storage Ideas That Actually Work
Your options depend on the width of the gap and your tolerance for installation. Some solutions require zero fastening: others need a stud finder and 1.25-inch wood screws.
Slim Shelving and Vertical Solutions
If you have 12 inches or more of width, a narrow wall-mounted shelf or a tall, slender shelving unit fits perfectly. Measure your studs first, they’re typically 16 inches on center in older homes and sometimes 24 inches in newer construction. You need at least one fastening point into a stud for safety.
A basic approach: install a 1-inch pine or plywood shelf (actual depth around 10 inches works for most gaps) using L-brackets rated for 50 to 75 pounds. Most laundry supplies are lightweight, so this capacity is plenty. Use a stud finder to locate studs, drill pilot holes with a drill and 3/32-inch bit, then screw in your brackets. Install multiple shelves if height allows, one shelf above the appliances, one at mid-height, and you’ve tripled your usable storage.
Alternatively, freestanding narrow shelving (often called “utility shelves” or “ladder shelves”) requires no fastening. These lean against the wall and sit between the appliances. Look for units 8 to 12 inches wide with adjustable shelves. They’re stable if the floor is level, and you can move them if you relocate appliances later. Popular retailers like apartment supply stores carry these under various names.
Vertical solutions work well because laundry rooms are usually cramped. Going up instead of out is the way to use that overlooked space. Stack detergent bottles, cleaning rags, and lint roller supplies: hang spray bottles on hooks mounted to the shelves.
Rolling Carts and Drawer Systems
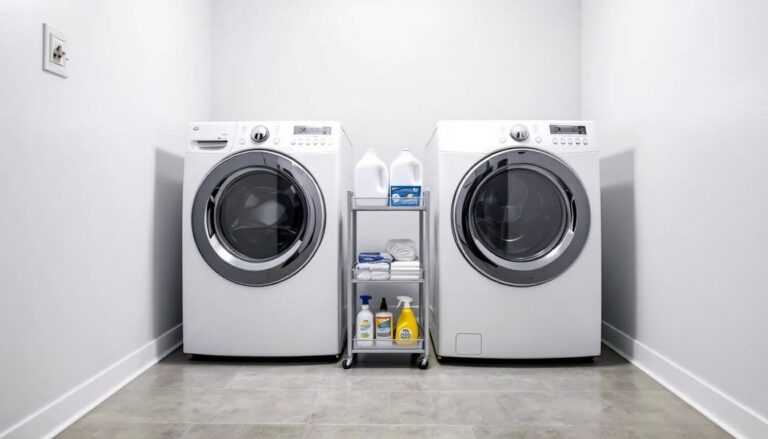
A 3-tier rolling cart, typically around 10 inches wide and 24 inches tall, slides easily between appliances and pulls out when you need it. These carts often have brake casters on the bottom, so they won’t roll away while you’re grabbing something. The beauty here is flexibility: if the gap is uneven or the floor slopes, a rolling cart adapts without looking awkward.
Pro tip: don’t leave a cart wedged between the appliances permanently. The vibration from the machines can cause a cart to shift and slide into the wall or appliances. Instead, tuck it in when you’re not actively working, or secure it with a velcro strap looped to a cabinet or fixed shelving nearby.
For a more permanent solution, a narrow drawer cabinet, typically 12 inches wide and 36 inches tall, works if you have a stud to anchor it. These offer concealed storage, which keeps the laundry room looking tidier. Measure twice before fastening: you want it level using a 2-foot level, and you’ll need 2.5-inch wood screws into studs for safety.
Another option is a tension rod hung with shelves or hanging organizers. A tension rod stretches between the two appliances (if they’re close enough, around 24 to 30 inches apart). From it, you can hang small baskets or wire shelves with S-hooks. This setup is flexible, removable, and ideal for lightweight items like dryer sheets, fabric softener, or cleaning gloves.
DIY Storage Projects for the Space Between
If you’re comfortable with basic carpentry, you can build a custom shelf or frame that fits your exact gap. This isn’t complicated, most projects take a couple of hours.
Simple Wall-Mounted Shelf Project:
- Measure and mark your desired shelf height on both sides of the gap using a pencil and level. Make sure the marks are level across both walls.
- Locate studs using a stud finder and mark them lightly.
- Position L-brackets on the marked lines so that fastening holes align with studs. Pre-drill pilot holes to avoid splitting the drywall or studs.
- Screw in brackets using 1.25-inch wood screws rated for your expected load.
- Cut a 3/4-inch pine or plywood shelf to width (typically the gap minus 1/4 inch for clearance). Sand the edges smooth with 80-grit sandpaper.
- Set the shelf on the brackets and secure with screws from underneath if the brackets have mounting holes on top.
- Apply a finish, paint or stain, if desired. Let it dry completely before loading.
Rolling Cart Customization:
If you buy a basic metal rolling cart, you can add custom wooden shelves. Measure the interior shelf space, cut 3/4-inch plywood to fit, and lay them on the cart’s existing metal rods. You can also line shelves with adhesive shelf liner to prevent bottles from sliding when the cart moves.
Safety first: Wear safety glasses when cutting, dust mask when sanding, and work gloves when handling metal brackets or fasteners. Ensure your drill and circular saw are grounded if corded, or use lithium-ion battery-powered tools for cleaner, safer operation.
Before fastening anything, test-fit your storage in the gap. Push it in, check clearance on all sides, and make sure nothing blocks access to outlets, vents, or the appliance controls. Once you’ve confirmed the fit, installation is straightforward. If measurements are off by more than a quarter-inch, adjust before permanent fastening, it’s easier to modify a cart or shelf before it’s anchored than after.
Many DIYers find that simple solutions like slim shelving and carts transform a cramped laundry space without major expense. You can also find design-forward ideas that blend storage with style: these between-appliance organizational tips often combine function and aesthetic appeal. For those tackling small space living challenges, the gap between appliances is prime real estate worth optimizing.