Table of Contents
ToggleA laundry room crammed with detergent bottles, lint rollers, and stray socks scattered across countertops isn’t just unsightly, it wastes valuable space and makes laundry day feel chaotic. Laundry room storage cabinets with doors solve this problem by tucking away clutter while keeping frequently used items within arm’s reach. Unlike open shelving, cabinets with doors hide the mess, protect contents from dust and humidity, and give your laundry room a finished, intentional look. Whether you’re working with a dedicated laundry room or a closet-sized corner, the right storage solution transforms both function and appearance. This guide walks you through selecting, installing, and organizing cabinets that fit your space, budget, and lifestyle.
Key Takeaways
- Laundry room storage cabinets with doors hide clutter while protecting contents from dust, humidity, and UV exposure, keeping hazardous items safely away from children and pets.
- Choose door styles based on your environment: slab doors for affordability and clean finishes, frame-and-panel for traditional durability, louvered for ventilation, or glass-front for visual appeal—prioritizing moisture resistance for humid laundry spaces.
- Plan your cabinet layout by measuring your appliances, inventorying supplies, and mounting cabinets at least 12 inches above washers or dryers to prevent heat and moisture damage while ensuring doors open fully.
- Install wall-mounted cabinets securely by locating studs, using 3-inch wood screws or lag bolts for heavy loads, and verifying plumb and level before final fastening—anchor tall cabinets to walls to prevent tipping.
- Organize cabinet interiors using clear bins, labeled shelves, and pull-out drawers to separate weekly staples from occasional-use items and maximize vertical space with door-mounted hooks for convenient access.
Why Laundry Room Storage Cabinets With Doors Make a Difference
Closed-door storage cabinets offer tangible benefits beyond aesthetics. First, they protect contents from dust, lint, and moisture, critical in a laundry environment where humidity fluctuates during washing and drying cycles. Second, they keep hazardous items like bleach, fabric softener, and stain removers safely out of reach if you have kids or pets. Third, cabinets with doors create visual continuity, making even a small laundry area feel organized and designed rather than utilitarian.
Compare this to open shelving: exposed bottles catch dust, spill risks increase, and every shelf becomes a design decision. A cabinet door closes the narrative, literally. You’re not paying for premium aesthetics if you’re hiding it behind a door anyway, so investment in materials matters less than fit and function.
For most homeowners, the shift from open to closed storage means reclaiming peace of mind. Guests don’t peek into your laundry chaos, and you don’t stress about tidiness every time someone passes through. Functionally, doors also protect delicate detergents and specialty products from UV exposure and temperature swings.
Types of Door Styles and Materials to Consider
Popular Door Options for Every Budget
Slab doors are the simplest and most affordable option. A flat, solid panel in plywood, MDF, or solid wood, they fit tight spaces and accept paint or stain easily. They work well in laundry rooms where you want a seamless, clean finish. Labor and hardware costs are minimal because there’s no rail-and-stile joinery to manage.
Frame-and-panel doors use a wooden frame with a recessed wood or plywood center panel. This style is more forgiving in humid conditions because the panel can expand and contract without binding the frame. It’s a step up in cost but looks finished and traditional. Many cabinet builders use this style as a standard.
Louvered doors have angled slats that allow air circulation, helpful in laundry rooms where ventilation matters. Dust does settle on the slats, so cleaning takes more effort, but the visual break and moisture management justify the trade-off for some homeowners.
Glass-front doors showcase contents while keeping them covered. Tempered glass is safer than standard pane, and items inside must stay neat. This option works if your interior is color-coordinated or you’re storing attractive baskets and bins. It costs more upfront but adds perceived value to the space.
Material choices include solid wood (hardwoods like oak, maple, or pine offer durability and refinish-ability but cost more), plywood and MDF (budget-friendly and stable in humid environments when properly sealed), and thermofoil or PVC wraps (factory-finished, moisture-resistant, and low-maintenance but harder to repair if damaged).
For a laundry room specifically, prioritize moisture resistance and ease of cleaning over decorative detail. Thermofoil finishes and sealed plywood handle humidity better than unfinished solid wood.
Space Planning: Maximizing Your Laundry Room Layout
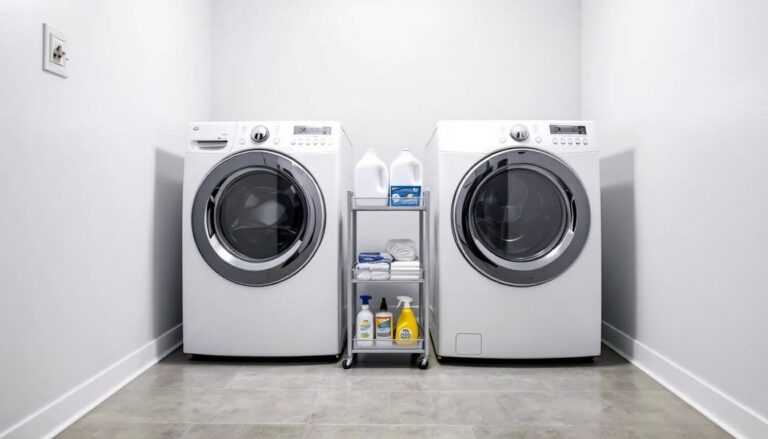
Before buying or building cabinets, measure twice and think about workflow. Most laundry rooms follow a linear or L-shaped layout: washer, dryer, and folding surface in one direction, with storage flanking one or both sides.
Start by identifying what you actually store: detergent (liquid and powder), bleach, fabric softener, lint rollers, stain stick, dryer sheets, hangers, and possibly an iron and ironing board. Tally the volume, you’d be surprised how much space a year’s worth of supplies occupies. A standard 24-inch-deep cabinet accommodates most bottles and boxes comfortably: deeper cabinets (30 inches) are overkill and eat into floor space.
Height matters too. Wall-mounted cabinets above the washer/dryer (typically 36 to 42 inches tall) keep items visible and reachable without bending. A lower bank of cabinets beside the dryer (knee-height, around 24 inches tall) stores bulky items like extra detergent jugs or cleaning supplies. If you have vertical space, a tall cabinet (floor to soffit, often 84 inches) maximizes storage without expanding your footprint, though you’ll need a step stool for upper shelves.
Consider mounting cabinets at least 12 inches above the washer or dryer to avoid heat and moisture damage. If cabinets sit directly atop the machines, ventilation suffers and finishes deteriorate. Always check clearance for cabinet doors to open fully without hitting adjacent appliances or walls. A 36-inch-wide cabinet is standard: two smaller units often work better than one large one for layout flexibility.
Installation and DIY Setup Tips
Installing wall-mounted cabinets requires a stud finder, a level, shims, and fasteners rated for your wall type (drywall anchors for studs, toggle bolts or expanding anchors for between studs). Pre-drilled pilot holes prevent splitting and misalignment.
Locate studs with a quality stud finder and mark their centers: you’ll attach cabinet mounting rails or hangman brackets directly to studs using 3-inch wood screws. If your cabinet spans two studs, attach to both. For added strength, use lag bolts instead of standard screws if the cabinet will hold heavy loads (detergent bottles weigh fast).
Before hanging, assemble the cabinet on the floor and ensure doors open and close smoothly. Check that shelves sit level and don’t wobble. Many cabinet failures stem from skipped assembly checks. Use a long level (48 inches) to verify the cabinet is plumb (vertical) and level (horizontal) before driving final fasteners.
For freestanding cabinets, ensure the floor is level. Even a slight slope causes doors to swing shut or stick open. Shim under the feet as needed. Anchor tall cabinets to the wall, a 84-inch laundry cabinet can tip if bumped hard, especially with a door hanging open.
Most homeowners can handle this with basic tools: a drill, level, stud finder, and a socket set. If walls are uneven or cabinets exceed 48 inches in width, a second pair of hands makes alignment easier. If you’re uncomfortable at height or drilling into studs, hiring a handyperson for the hanging is reasonable insurance against installation mistakes. Once hung, the rest is cosmetic, hinges, handles, and interior organization are straightforward.
Organization Strategies for Cabinet Interiors
A cabinet’s effectiveness depends on how you organize inside. Start with a plan: top shelves for occasional-use items (spare detergent boxes, specialty stain removers), middle shelves for weekly staples (active detergent, dryer sheets), and lower shelves for bulky supplies (bleach, extra jugs).
Use clear plastic bins or labeled baskets to group similar items. A 10-inch-deep bin tucks dryer sheets, lint rollers, and fabric fresheners together. Another bin holds iron-related supplies if you keep an iron in the laundry room. Hooks inside cabinet doors maximize vertical space for hanging reusable shopping bags, aprons, or a drying cloth.
Pull-out drawers or sliding baskets solve the “reach-to-the-back” problem that plagues cabinet organization. A sliding basket means you grab items without knocking over everything in front. If cabinets come with adjustable shelves, stagger heights to fit bottles and boxes without wasted air space, a 12-inch shelf works for most detergent bottles: 8 inches suits smaller containers.
Label shelves or bins so everyone in the household knows where items belong. This prevents chaotic restocking and makes it obvious when supplies run low. A simple white label maker and contact paper transform a cluttered cabinet into a system.
If you’re using standard IKEA Hackers cabinets as your base, interior organizers and drawer kits turn a basic shell into a tailored system. Measure your cabinet’s interior depth and width before ordering accessories, a 3-inch mismatch wastes money and space.
Conclusion
Laundry room storage cabinets with doors deliver organized, functional spaces that feel intentional rather than utilitarian. Whether you choose simple slab doors, stylish frame-and-panel designs, or glass-front showcases, the key is matching your choice to your space, humidity level, and daily routine. Smart spacing, solid installation, and a logical interior layout turn a storage cabinet from a generic box into the backbone of a functional, calm laundry environment. Start with a clear inventory of what you store, measure your space carefully, and don’t rush installation. A well-hung cabinet with thoughtful organization lasts years and makes laundry day noticeably easier.