Table of Contents
ToggleA bed frame with built-in storage solves one of the biggest bedroom dilemmas: where does everything go? Whether you’re furnishing a small apartment or maximizing a guest room, a DIY storage bed frame delivers both comfort and function without the premium price tag of store-bought options. This guide walks you through building an easy DIY bed frame with storage that fits your space and skill level, no advanced carpentry experience needed. You’ll learn which design works best for your needs, what materials to grab, and exactly how to assemble a sturdy, functional piece that serves double duty.
Key Takeaways
- A DIY bed frame with storage costs $300–$600 in materials compared to $800–$2,000 for store-bought options, making it an affordable way to maximize bedroom space.
- Choose between three main designs—platform with under-bed storage, drawer storage bed, or lift-top platform—based on your skill level and storage needs.
- Proper construction requires quality materials like 3/4-inch cabinet-grade plywood, 2×8 lumber, pocket hole joinery, and ball-bearing drawer slides rated for at least 100 pounds.
- Take time sanding and finishing your DIY storage bed frame with multiple grits and polyurethane sealer to ensure durability and a professional appearance that lasts decades.
- After assembly, test frame stability and add support features like slats across joists to prevent sagging and moisture damage to your mattress.
Why Choose a Bed Frame With Built-In Storage
A bed frame with integrated storage solves the classic bedroom space crunch. Instead of shoving bins under the bed or buying a separate dresser, you’re creating functional real estate that’s already there. This approach works especially well in bedrooms under 150 square feet, where every inch counts.
Building your own means you control the design. Want shallow drawers for seasonal clothing? Or a lift-top platform that opens for blanket storage? You decide. Store-bought options often force you into fixed configurations that don’t match your actual needs, and they cost significantly more. A quality furniture-store storage bed runs $800–$2,000, while a DIY version with similar capacity typically lands between $300–$600 in materials.
There’s also the satisfaction factor. You’ll know exactly how it’s built, understand every joint, and be able to repair or modify it down the road. Plus, a solid wood or quality plywood storage bed lasts decades if constructed properly and maintained.
Materials and Tools You’ll Need
Choosing the Right Wood and Hardware
Wood Selection
For a storage bed frame, choose between solid wood and plywood depending on budget and aesthetics. Solid pine or oak costs more but gives a finished look if you’re staining. Plywood (3/4-inch cabinet grade) is budget-friendly and works well under platform beds or when covering with fabric. Avoid particle board for structural components, it doesn’t hold fasteners reliably.
You’ll need 2×8 or 2×10 lumber (actual dimensions are 1.5″ × 7.25″ or 1.5″ × 9.25″) for the outer frame, and 2×6 boards for internal supports. Nominal sizes can vary slightly by region and mill, so measure before buying. For a queen-size platform, expect roughly 80–100 board feet of lumber.
Materials List
- 2×8 or 2×10 lumber for perimeter frame
- 2×6 joists for support (16 inches on center)
- 3/4-inch plywood for platform or drawer bottoms
- 1/2-inch plywood for drawer sides
- Wood screws (2.5-inch and 1.5-inch)
- Wood glue (waterproof)
- Drawer slides (ball-bearing, 100-pound capacity minimum)
- Cabinet hinges (if lift-top design)
- Finishing nails or brad nails (1.5-inch)
- Wood filler and sandpaper (80, 120, 220 grit)
Tools Required
- Circular saw or miter saw (miter saw gives cleaner crosscuts)
- Drill-driver with bits
- Pocket hole jig (Kreg jigs are standard: a basic model runs $30–$50)
- Tape measure and carpenter’s square
- Level (at least 24 inches)
- Clamps (at least four 36-inch clamps)
- Orbital sander or sanding block
- Safety gear: goggles, work gloves, dust mask (N95 minimum for sawdust)
Design Options: Platform, Drawer, and Lift-Top Styles
Three main approaches suit different needs and skill levels.
Platform Bed with Under-Bed Storage
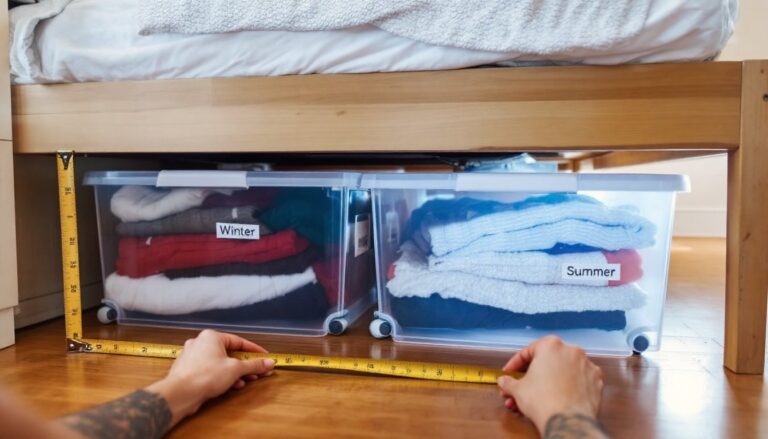
This is the easiest entry point for DIYers. You build a simple frame with a low profile, then add storage bins or shallow rolling drawers underneath. The mattress sits directly on a slatted platform (no box spring needed). This style works well if you don’t want to cut and hang multiple drawers. You can retrofit existing under-bed storage solutions or build simple wooden boxes on casters.
Drawer Storage Bed
This is the true storage workhorse. The frame includes built-in drawers that pull out from the sides or foot of the bed. Drawers require precise measurements, quality slides, and carpentry for neat alignment, but they’re not difficult if you work carefully. A diy storage bed with two to four large drawers can hold 100+ pounds of clothing, linens, or off-season gear. Drawer slides must be rated for your anticipated load (100-pound slides are standard for bedroom beds).
Lift-Top or Platform-Lid Design
The entire platform raises on hinges or gas struts to access a hollow chamber underneath. This maximizes storage in the footprint and works especially well for queen or king frames. You’ll need heavy-duty hinges and proper reinforcement, and it’s physically harder to construct but incredibly functional. Ana White has step-by-step plans for lift-top beds if you want a detailed roadmap.
Step-by-Step Construction Process
1. Cut and Assemble the Frame
Measure your mattress and add 2–4 inches on each side for the outer frame dimensions. For a queen (60″ × 80″), your frame should be roughly 64″ × 84″ exterior. Cut your 2×8 or 2×10 boards to length. Use a miter saw for precise 90-degree cuts: a circular saw works but requires careful setup.
Assemble the perimeter using pocket holes and wood glue. A pocket hole jig lets you join boards invisibly, screws are hidden inside the joint. Drill pocket holes on the inside faces of the end boards, then attach them to the length boards with 2.5-inch pocket hole screws. Add a second set of pocket holes if the span exceeds 60 inches to prevent racking (twisting out of square).
2. Install Support Joists
Inside the frame, install 2×6 joists perpendicular to the length, spaced 16 inches on center. These distribute the mattress weight and prevent the platform from sagging. Attach each joist with pocket holes or lag bolts (5/16-inch × 4-inch). Lag bolts require drilling pilot holes and are overkill for most residential beds, but pocket holes are cleaner and plenty strong.
3. Add the Platform or Drawer Framing
If building a platform, cut 3/4-inch plywood to fit the top, and secure it with pocket holes or pocket hole screws from underneath. Sand all edges smooth and seal any exposed plywood edges with wood filler to prevent moisture absorption.
For drawer beds, build drawer boxes from 1/2-inch plywood, then mount ball-bearing slides on the inside faces of the frame. Slides must be perfectly parallel and at the same height, so test fit everything before fastening. Most slides require 1/2-inch clearance on each side of the drawer.
4. Sand and Finish
Sand all exterior surfaces, starting with 80-grit to remove mill marks, then 120-grit, and finish with 220-grit for a smooth feel. Vacuum thoroughly between grits, dust particles on coarse sandpaper gum up finer abrasives.
Apply stain if desired (two coats, sanding lightly between), then seal with polyurethane, tung oil, or paint. Fix This Build That has solid guidance on finishing techniques if you’re new to woodworking finishes. A quality finish protects the wood and makes the bed look professional.
5. Install Mattress Support
For platform beds, add slats (1×3 or 1×4 lumber spaced 4 inches apart) across the joists. For a more flexible setup that accommodates box springs, install a central support beam and use bed slats. Never place a mattress directly on plywood without slats, it traps moisture and degrades the foam.
Safety and Permits
A residential bed frame doesn’t require a building permit in most jurisdictions, but it must be safely constructed to hold a typical load (300–400 pounds). Ensure all fasteners are tight before use, and test the frame stability by applying downward pressure at the center and corners. If it flexes more than 1/4 inch, reinforce with additional joists or cross-bracing.
Finishing Touches and Customization Ideas
Once the basic frame is done, you can enhance both function and aesthetics.
Storage Organization
Add dividers inside drawers to separate clothing by type. Fabric drawer inserts prevent socks from sliding around and keep things organized. If you’re going the under-bed route, label storage bins clearly and keep an inventory list so you actually use the space. A full size storage bed frame can hold surprising volume, don’t let it become a forgotten clutter pit.
Upholstery and Visual Appeal
Upholster the platform edge with fabric and nailhead trim for a polished look, or leave it natural if you prefer a minimalist aesthetic. You can wrap the exterior frame with iron pipes (industrial style) or add decorative paneling. Paint or stain to match your bedroom. Soft-close drawer slides add a luxury touch and cost only $30–$50 more per pair.
Headboard Integration
Attach a headboard to the frame for stability and comfort. Many DIYers build a matching wooden headboard with shelves or upholstery. If you’re interested in hacks for existing furniture, IKEA Hackers showcases creative mods to standard frames that you can adapt.
Height Adjustments
If you want easier access to drawers, raise the bed on furniture feet (4–6 inches is common). This also makes vacuuming underneath simpler. Make sure the frame is perfectly level after any height adjustment, use shims under the feet if your floor isn’t flat.
Conclusion
Building a DIY bed frame with storage is a manageable, rewarding project that pays dividends every single day. Whether you choose a simple platform with rolling bins or a fully equipped drawer system, you’ll gain storage, save money, and end up with exactly what you need. Start with a clear design in mind, measure twice, and take time with joinery and finishing, these details separate a wobbly project from a bed that lasts twenty years. Your bedroom will be more organized, and you’ll have the satisfaction of knowing you built it yourself.