Table of Contents
ToggleWhether you’re a teacher managing dozens of art supplies, a homeschool parent organizing curriculum materials, or a school administrator outfitting multiple classrooms, classroom storage bins are the backbone of an efficient learning environment. A well-organized space directly impacts student engagement and productivity, kids know where materials are, teachers spend less time hunting for supplies, and everything runs smoother. The right storage solutions aren’t just about fitting things in boxes: they’re about creating systems that everyone can use intuitively. In this guide, we’ll walk you through choosing and setting up classroom storage bins that actually work.
Key Takeaways
- Classroom storage bins create organized learning environments that boost student independence and reduce classroom management time by giving every item a designated home.
- Choose durable, appropriately-sized classroom storage bins based on actual inventory needs and available space—avoid cheap options that fail within months and opt for mid-range containers rated for repeated stacking.
- Implement a consistent labeling and color-coding system with printed labels on multiple sides, and involve students as supply monitors to maintain organization and build responsibility.
- Stackable storage solutions designed specifically for classrooms protect supplies from damage, prevent loss, and maximize shelf space in tight areas.
- Create traffic-flow zones by placing frequently accessed bins near bottleneck areas like pencil sharpeners and supply tables, and use internal dividers to prevent item pile-up.
- Protect your budget investment by storing supplies properly—well-organized classroom storage bins prevent markers from drying out, paper from bending, and costly replacements throughout the year.
Why Classroom Storage Bins Matter for Learning Environments
A cluttered classroom creates friction. Students waste time looking for scissors or markers. Teachers get frustrated retrieving materials mid-lesson. Supplies get damaged or lost because nobody knows where they belong. Good storage bins eliminate these problems by giving every item a home.
Beyond the practical side, organization affects behavior and learning. When materials are visible and accessible, students feel empowered to work independently. They can grab what they need without constant teacher oversight. This builds responsibility and reduces classroom management headaches.
Storage bins also protect your investment. Quality supplies cost money, and losing them to dust, spills, or damage cuts into your budget. Properly stored markers won’t dry out, paint won’t separate, and paper won’t get bent. You’ll actually use what you buy instead of replacing damaged goods twice a year.
Finally, organized spaces are safer spaces. Tripping hazards disappear when items are in bins instead of stacked on the floor. Chemicals and sharp tools stay contained where they belong. Parents and administrators notice when a classroom looks deliberately managed rather than chaotic.
Types of Storage Bins for Every Classroom Need
Open-Top and Stackable Options
Open-top bins work best for items students grab frequently. Paint bottles, markers, colored pencils, and scissors live here because speed matters. No lids to fight with, just reach in and grab. Clear plastic bins let you see contents at a glance, which saves time and prevents duplicate purchases. Standard 16-quart to 20-quart sizes handle pencils and small supplies efficiently: gallon-size containers work for bulkier items.
Stackability is crucial in tight spaces. Look for bins with reinforced bottoms and smooth, level tops so they won’t wobble under load. Most classroom storage depends on stacking, so avoid flimsy options that collapse after a few weeks. Deep, rectangular bins stack more stably than wide, shallow ones.
For heavier items, clay, heavy paper reams, textbooks, ensure the bin has a weight rating. A 40-pound stack of supplies feels innocent until a bottom bin fails and everything crashes to the floor. Read the spec sheet, not just the marketing copy.
Labeled and Color-Coded Systems
This is where organization becomes teachable. A label maker is worth the $20 investment. Printed labels last longer than hand-written ones and set a standard for consistency. Include both words and pictures if you have younger students, a drawing of scissors next to the word “scissors” works better than text alone.
Color coding works when you have a system. Maybe red bins hold art supplies, blue bins store math manipulatives, green bins contain science materials. Consistency matters: everyone has to follow the same code or it falls apart. Assign a student or staff member to maintain the system. When someone returns a bin, it should go to the right color zone every time.
Label the bins on at least two sides so items are findable from different angles. If bins slide into shelving, label the spine. If they sit on top of shelves, label the front. Teachers working at different times of day will thank you.
How to Choose the Right Storage Bins for Your Space
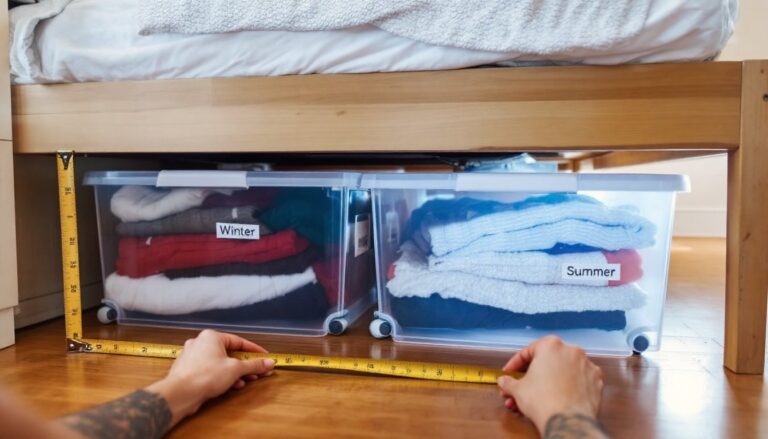
Start by measuring your shelving or available floor space. Sketch a quick layout showing shelf width and depth. Bins that are 2 inches too wide won’t fit, no matter how perfect they are otherwise. Bring measurements with you if you’re shopping in person.
Inventory what you actually store. Do you have lots of paper and flat supplies, or mostly three-dimensional items? Craft teachers need wider, shallower bins. Science teachers need partitions for test tubes and small parts. Don’t buy 20 identical bins and hope they work: buy variety based on your actual inventory. Many retailers sell assortments, mixed sizes in a pack, which is a smart starting point.
Consider who’s using the bins. If kindergarteners access them, bins should be lightweight and at accessible heights. Older students can manage heavier containers and reach higher shelves. Teachers and aides retrieving supplies during setup need bins that don’t require a ladder or excessive stretching.
Budget matters, but cheap bins fail fast. A 10-pack of mid-range plastic bins costs $30–$50 and lasts 3+ years. Dollar-store bins crack after a few months. Do the math: spending $50 once beats buying $20 in bins twice a year. Look for bins rated for repeated stacking and use, not one-time storage. Stackable storage solutions specifically designed for classroom environments often offer better durability than generic containers.
Durability also means UV-resistant plastic if bins sit near windows. Sunlight degrades cheap plastics quickly. Clear bins let sun damage accelerate. If your classroom gets strong afternoon light, consider opaque or tinted bins in high-traffic areas.
DIY Organization Tips for Maximum Efficiency
Before you buy a single bin, create zones in your classroom. Art supplies here, manipulatives there, books in another area. Walk through a typical lesson and notice where traffic jams form. Bottlenecks usually happen at pencil sharpeners, sink areas, or the supply table. Put the most-accessed bins closest to those spots.
Use dividers inside larger bins. Plastic organizers or cardboard dividers ($5–$15 per set) turn one wide bin into multiple compartments. This prevents the pencil pile-up where sharpened and unsharpened pencils get jumbled together. Markers stay separated by color. It sounds small, but containers within containers make massive differences in usability.
Create an inventory system. Tape a list of contents to the bin’s lid. Check items off as they’re used, then restock when supplies run low. Prevents the awkward moment when a student needs glue and three empty bottles remain. Many teachers use a clipboard system or phone photo of each bin’s contents for quick reference. Resources like Martha Stewart’s home organization guides offer sorting frameworks you can adapt for classrooms.
Rotate seasonal supplies. Pull bins for units you’re not currently teaching and store them elsewhere. This keeps your active shelving lean and manageable. Seasonal decorations, holiday craft supplies, and specialized materials for specific themes don’t belong in daily-access zones.
Label everything, then label it again. Sounds redundant but wait, six weeks in, labels peel or fade. Kids rearrange things. New students don’t know the system. Invest in durable label options: vinyl labels, laminated paper labels, or permanent marker on clear plastic tape. The $10 you spend prevents endless searching and misplaced supplies.
Involve students in maintenance. Assign a “supply monitor” each week who checks bins for damage, restocks empty items, and fixes messy piles. Kids respect systems they help build. They’re also more likely to follow rules they’ve helped create. Craft storage containers that engage students become personal projects, not teacher chores.
Consider accessibility for all learners. Some students have mobility challenges. Bins at eye level and within arm’s reach matter more than efficient stacking. Wide handles make carrying easier. Clear bins help students with visual processing differences locate specific items. Universal design benefits everyone, not just students with documented needs.
Conclusion
Classroom storage bins aren’t glamorous, but they’re foundational to functional learning spaces. Choose durable, appropriately-sized containers: label them clearly: and involve your students in the system. Well-organized supplies save time, protect investments, and create a calmer environment where teaching and learning actually happen. Start with a audit of what you own, measure your space, then invest in bins designed to handle real classroom use. Your future self will be grateful every single time you find what you need on the first try.